This document covers configuration of the following IMAP clients that support connecting to a secure IMAP server. In most cases, you will need an Application Passcode obtained from Zimbra to use as your password for all of these clients:
Make sure you read the NOTE at the bottom of this page.
| Settings Summary: | |
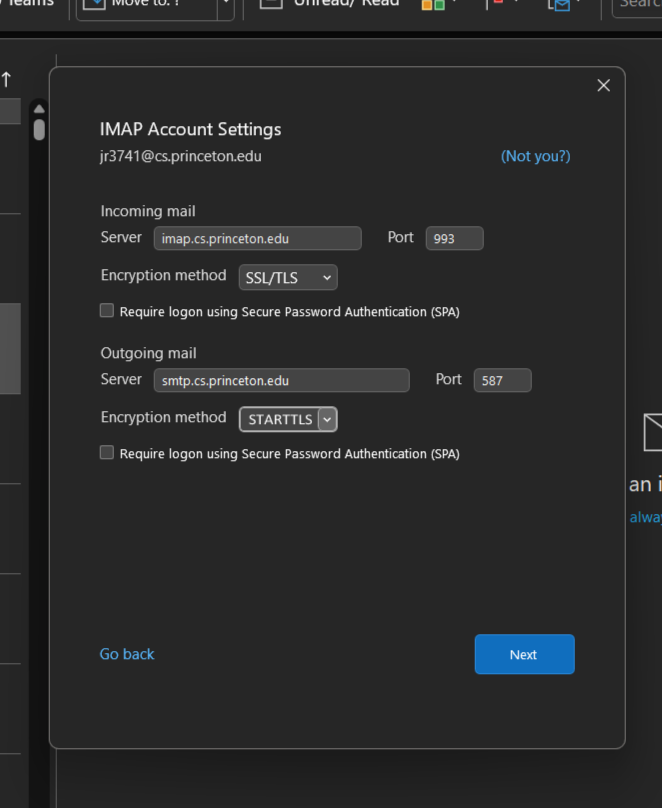
| IMAP (Incoming) Server: | imap.cs.princeton.edu |
| IMAP Settings / Port: | SSL / Port 993 |
| SMTP (Outgoing) Server: | smtp.cs.princeton.edu |
| SMTP Settings / Port: | TLS with Authentication / Port 587 |
Mozilla/Thunderbird
Make sure "Use secure connection (SSL)" is selected in the Server Settings section of the "Account Settings" dialog.
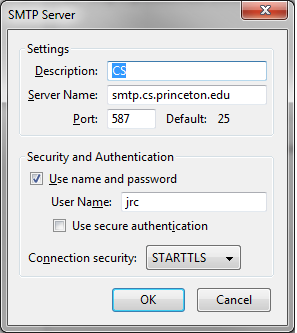
You should also turn on TLS and authentication in the "Outgoing Server (SMTP)" section. This is required for all users.
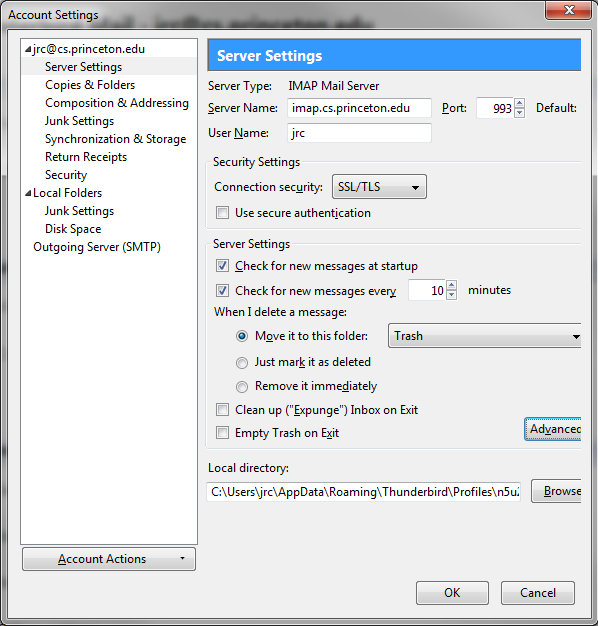

Note that the specific "IMAP server directory:" setting may vary if you use other mail clients that store mail in, for instance, ~/Mail/.
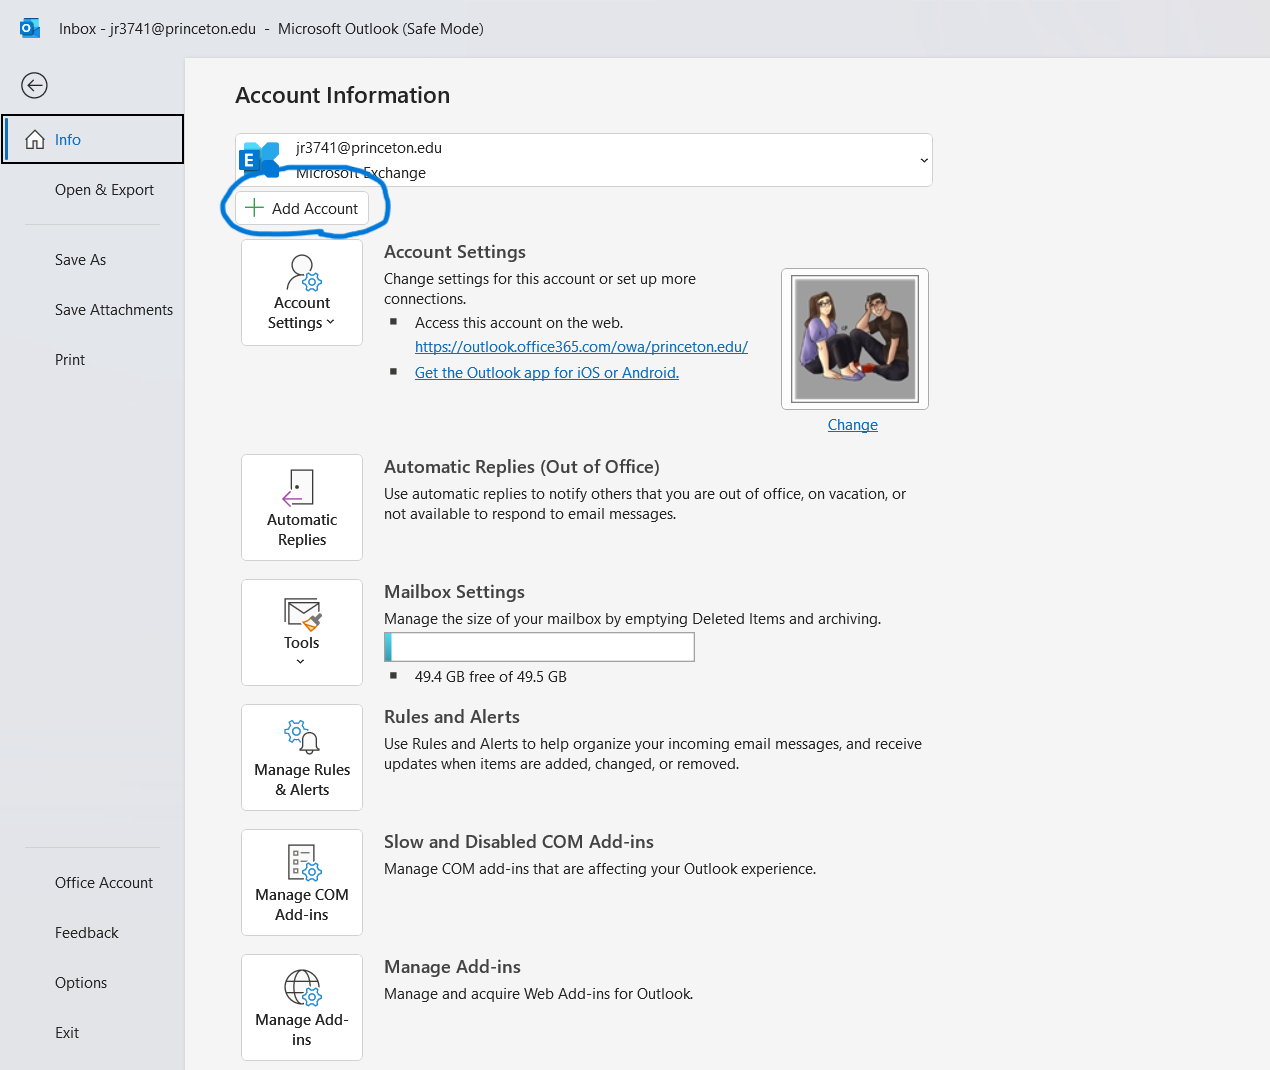
Microsoft Outlook
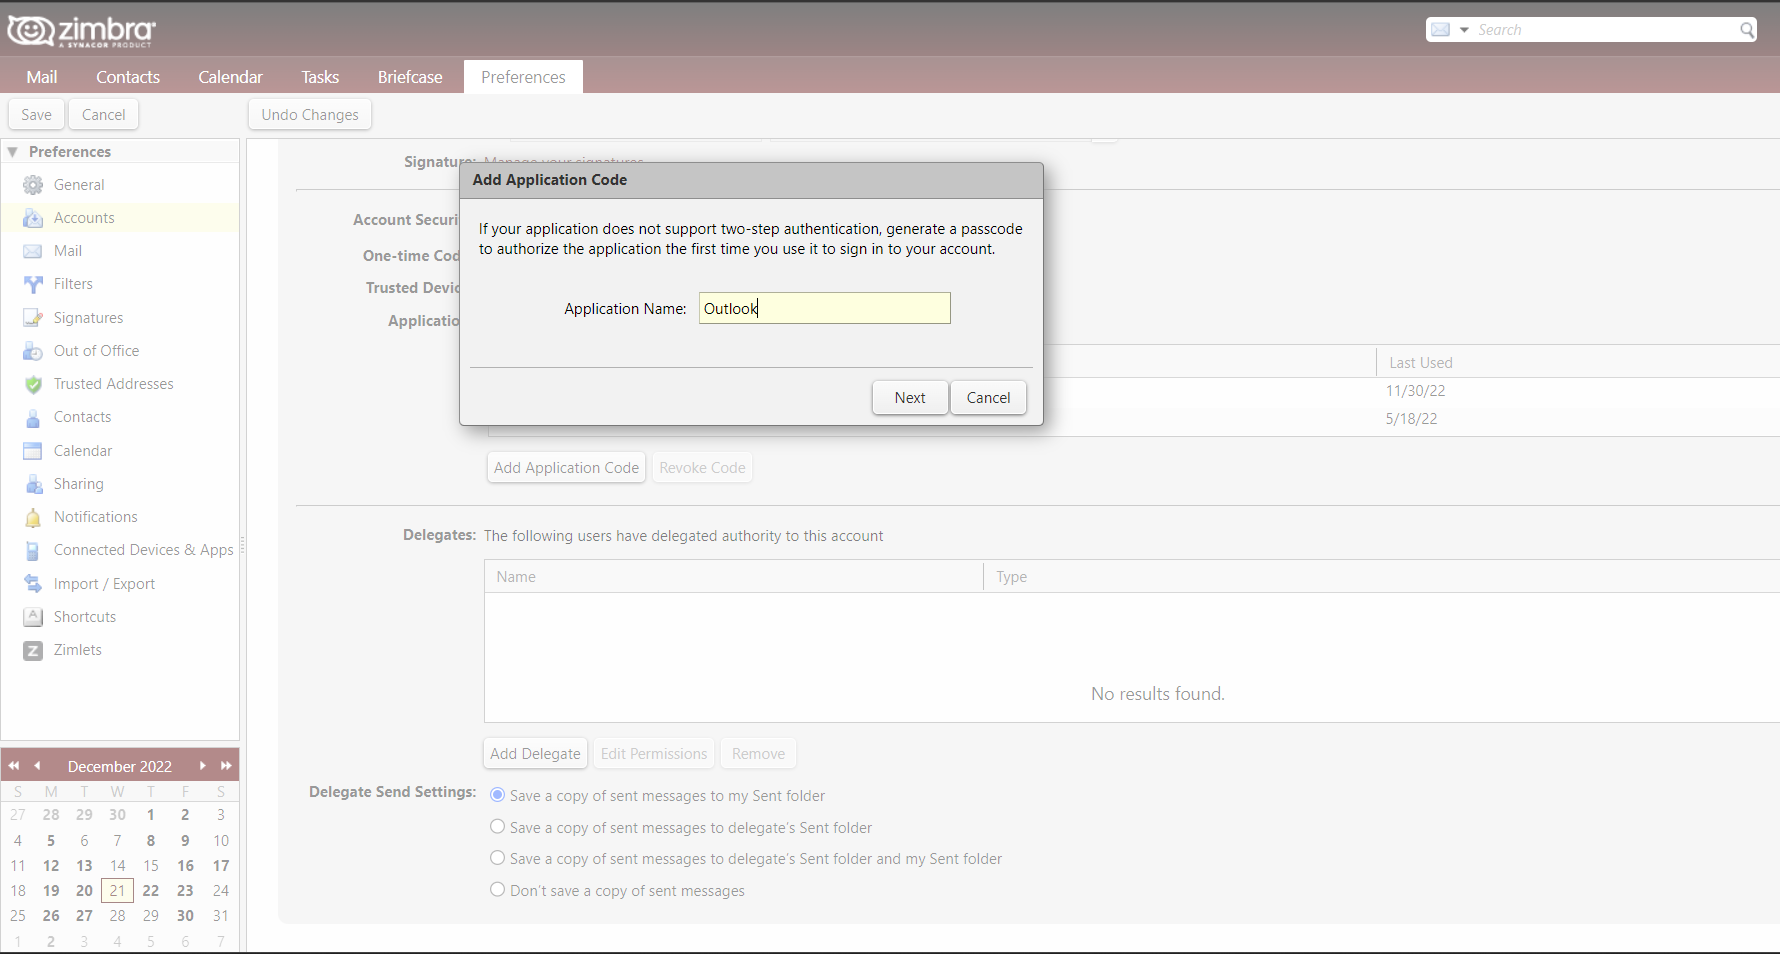
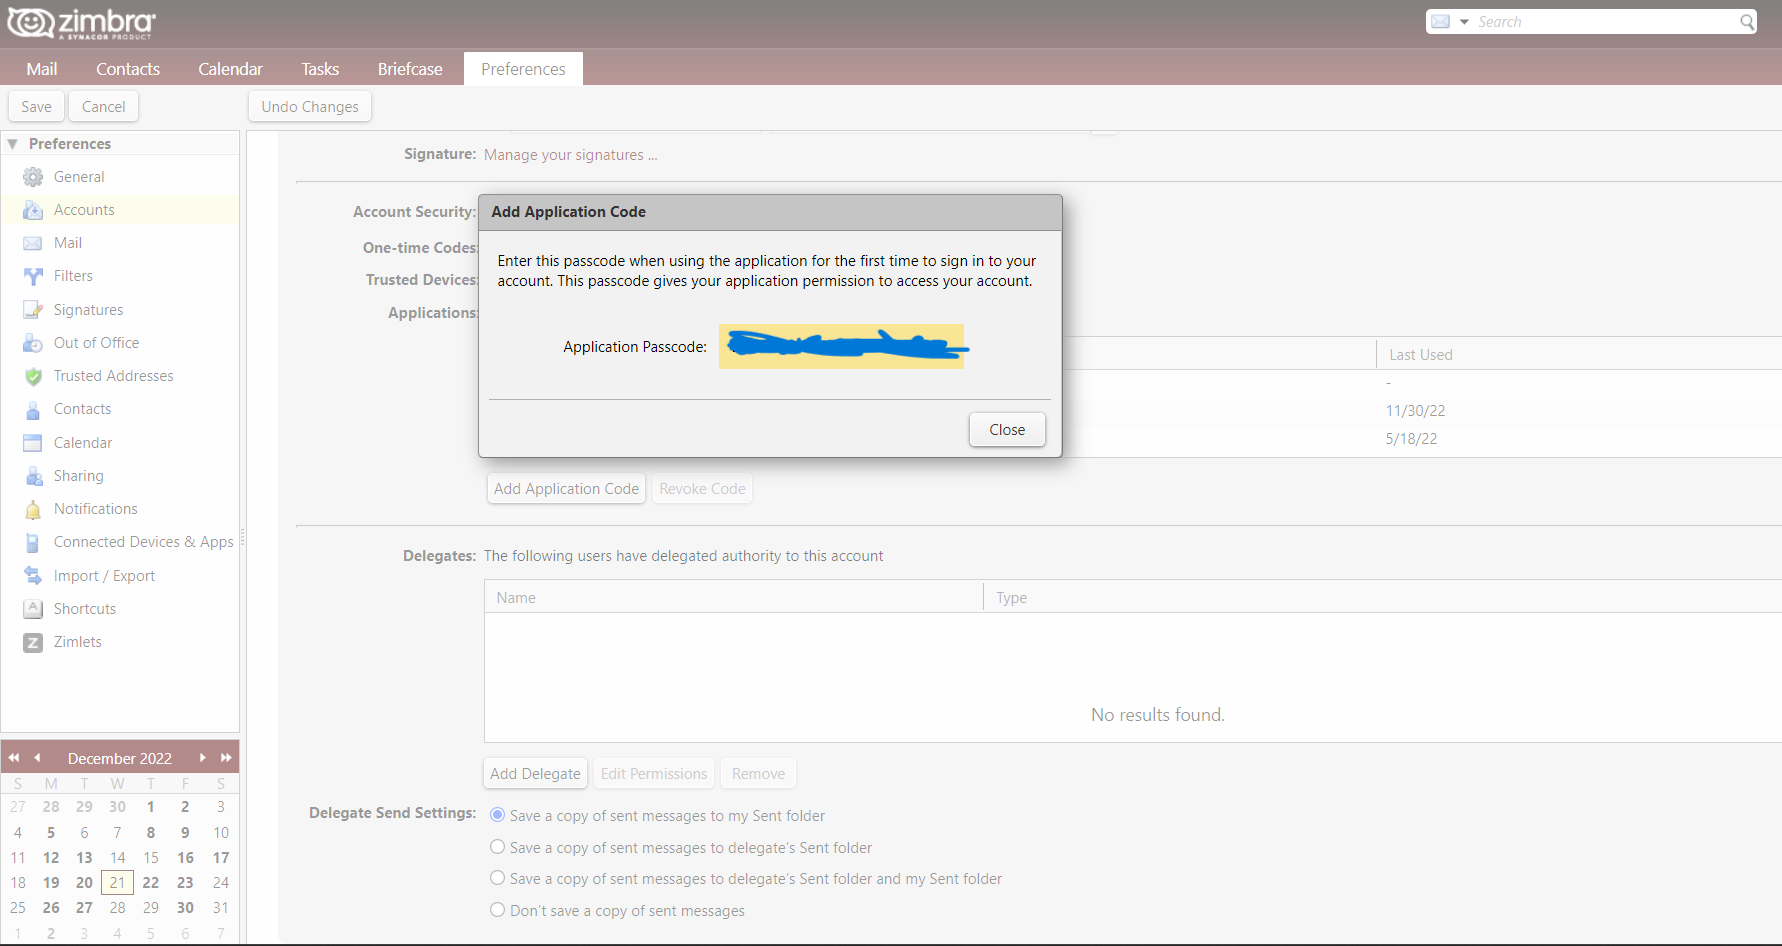
Starting in Zimbra you will need to create an Application Code which you will use later when prompted for a password in your mail client of choice, in this example Outlook.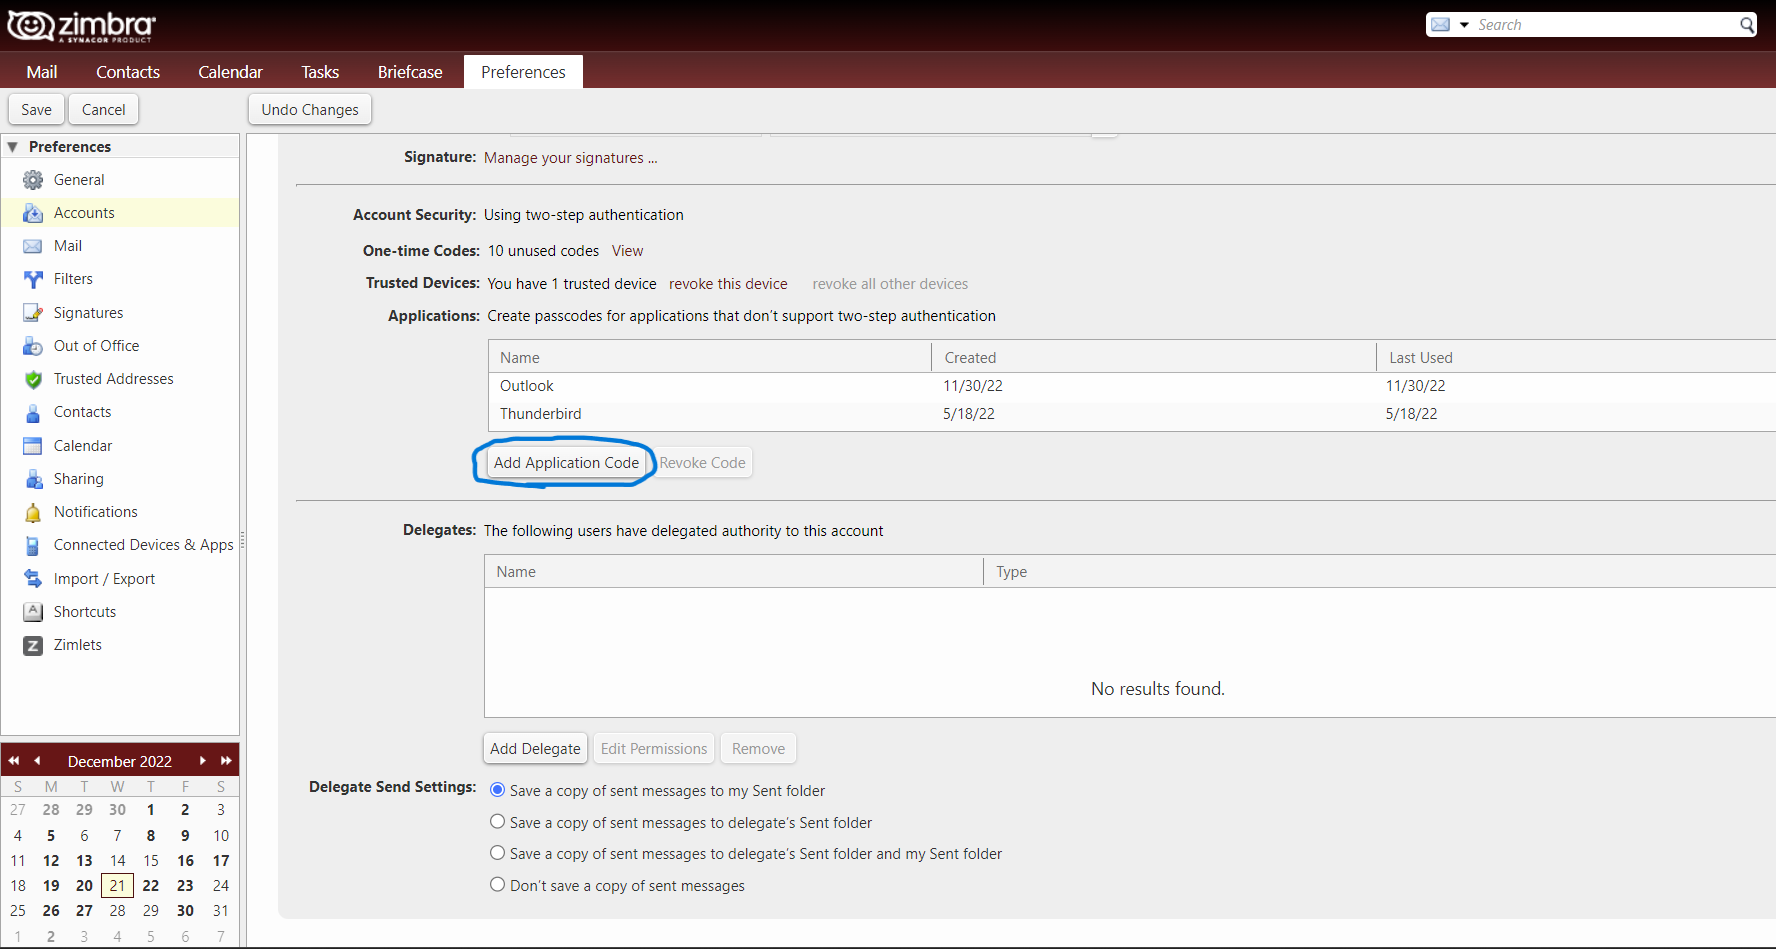
Make sure "Let me set up my account manually" is checked in the Advanced Options tab of the mail server settings dialog.
Once this information is put in you should get a loading screen followed by a prompt for your CS email password here you will paste the Application Password instead of your normal CS password. After a moment you will be all set and have your CS account in Outlook.
Fetchmail
Fetchmail is fairly well documented at the Fetchmail homepage. Specifically, the question of using SSL is covered in the FAQ.
Mac Mail.app
The setup section for Mail.app is awaiting screenshots.
The default "Drafts," "Sent," and "Trash" folders in the Mac Mail.app may not align properly with Zimbra immediately after adding the IMAP server to your Mac. The following instructions were taken from the Zimbra Wiki:
- Open Mail.app.
- Click on the Trash folder under your Zimbra account.
- Go to "Mailbox > Use this Mailbox for" and select Trash.
- Do the same for Sent and Draft folders (unless they have been automatically mapped).
- They will now appear below the Mail.app Trash, Sent, and Draft folders along with the special folders from other accounts.
- You will likely end up with new folders in the Zimbra section called 'Deleted Messages' and 'Sent Messages.'
- You should delete these folders now (move any mail before you delete them).
iPhone
You may prefer to use the ActiveSync protocol instead of IMAP, as documented here.
- Launch the "Settings" application and select "Mail, Contacts, Calendars."
- Select "Add Account..."
- Select "Other."
- Enter your full name and email address (including @cs.princeton.edu) in the appropriate fields
- Enter an Application Passcode obtained from Zimbra in the "Password" field.
- Enter a "Description" such as "CS IMAP"
- Select "Save" in the upper-right corner of the screen.
- Enter the "Incoming Mail Server" information:
- Host Name: imap.cs.princeton.edu
- User Name: your CS Unix username
- Your password should already be filled in.
- Enter the "Outgoing Mail Server" information:
- Host Name: smtp.cs.princeton.edu
- User Name: your CS Unix username
- Password: the Application Passcode obtained from Zimbra
- Select "Save" in the upper-right corner of the screen.
- When the "Secure Connection Failed" alert box appears, select "Continue."
- When the second "Secure Connection Failed" alert box appears, select "Continue."
- When you are returned to the "Mail, Contacts, Calendars" settings page, basic setup is complete.
Similarly to Mail.app, the defaults for the "Drafts," "Sent," and "Trash" folders on the iPhone may not align properly with the Zimbra IMAP server. Use the following instructions to finish the configuration of your IMAP account:
- On the "Mail, Contacts, Calendars" settings page, select the IMAP account that you just added (eg "CS IMAP").
- Scroll down and select "Advanced."
- In the "Mailbox Behaviors" section, select "Sent Mailbox."
- Scroll down and select "Sent" in the "On the Server" section.
- Touch "Advanced" in the upper-left corner of the screen.
- Select "Deleted Mailbox."
- Scroll down and select "Trash" in the "On the Server" section.
- Touch "Advanced" in the upper-left corner of the screen.
- If desired, modify the "Removed" setting in a similar fashion to the above.
- Exit the "Settings" application.
Please NOTE:
When specifying what IMAP server to connect to, it is imperative that you enter "imap.cs.princeton.edu." (Not "mail.cs.princeton.edu," not "mail," and not "imap.") This is because when a client connects to the secure IMAP daemon, the certificate that is presented to it by the server identifies the server as "imap.cs.princeton.edu." If you connect to the secure IMAP server using a different alias, your mail client will complain that the certificate is not valid. This warning also applies to the SMTP server: you must specify the name as "smtp.cs.princeton.edu."