| These instructions no longer work for SSH logins. |
|---|
The primary motivation for these instructions was to provide a mechanism to use Duo 2FA for SSH logins. This functionality requires the OTP feature of the Yubikey. Because OIT's Duo Portal no longer allows adding hardware tokens for OTP functionality, the content of this page is mostly no longer useful. It is kept here as a reference for folks who set it up while it was possible and may need to perform maintenance. Please refer to OIT's KB0013521 for information on remaining Duo functionality. |
Since 2016, Princeton has been using Duo for 2-factor authentication (2FA). Most users interact with Duo by way of the Duo Mobile application on a smartphone. For those without smartphones, or who wish to limit the use of their smartphone, other options exist. This document explains how to use one of those options, YubiKeys, instead of a smartphone, to accomplish Duo authentication.
Step 1. Acquire a YubiKey. The choice of which key is best suited is left as an exercise for the reader, but we recommend the "5" series keys. The less expensive "Security Keys" lack OTP features, which will limit the options for using the key.
Using YubiKeys with SSH login
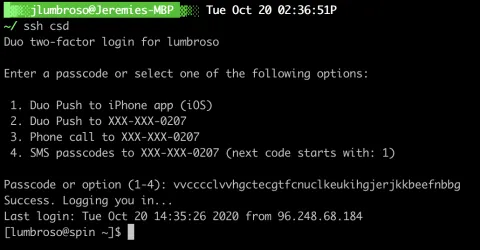
It is possible to use a YubiKey to complete a Duo 2FA. For Duo-enabled SSH connections, you will see a prompt something like this:
    Duo two-factor login for mynetid

    Enter a passcode or select one of the following options:

     1. Duo Push to XXX-XXX-0001
     2. Phone call to XXX-XXX-0001
     3. SMS passcodes to XXX-XXX-0001

    Passcode or option (1-3):
Many of the options are similar to the Duo web portal. But it is also possible to use a “passcode” which is directly generated by your YubiKey. This section describes how.
Step 2. This step involves manually configuring your YubiKey, which requires downloading the YubiKey Manager application.
Note that this software replaces a previous, deprecated application called the “YubiKey Personalization Tool”, to which some documentation still refers.
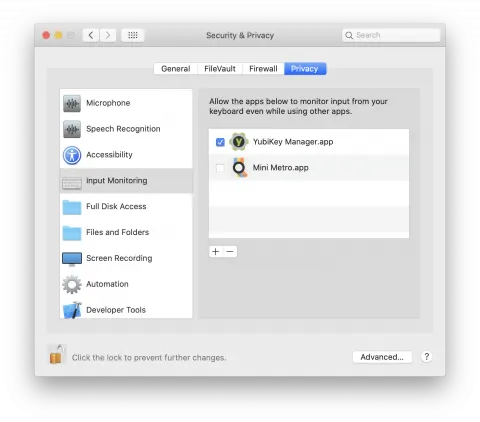
Step 3. Install the YubiKey Manager. You may have to authorize the application to access external devices.
On macOS, this is in “System Preferences” then the “Privacy” applet, and the “Input Monitoring” pane, the checkbox in front of “YubiKey Manager” must be checked on—note that this is only required for the software to program the key, and can be deactivated after the key has been configured without affecting the functionality:
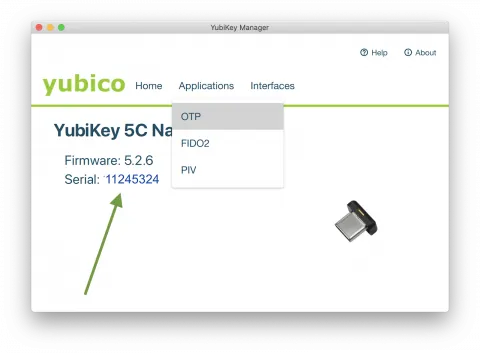
Step 4. Open YubiKey Manager, click on “Applications” and select “OTP” (One-Time Password, which is the functionality that will allow your key to generate passcodes for the SSH login). Note the key Serial Number for later use in Step 10. If the application hangs at this point, double-check that you have properly authorized the software as noted in Step 3 above.
Step 5. The YubiKey 5 has two slots that can be configured: One for a short press of the finger (0.3–1.5 seconds), and another for long presses (2.5–5 seconds), each of which can be configured separately.
By default, the short press is configured with a default OTP configuration, like the one we are about to set up, however, because we do not know and cannot recover its Private ID, Public ID and Secret, which are necessary to set it up with Duo, we are going to reset the slot so that we can provide the necessary information to Duo. Note that the first slot is also the slot used for WebAuthN authentications, like the Duo Web Portal authentication described later in this document. If you have already configured WebAuthN authenticators with this key, resetting the first slot will invalidate those enrollments, so they will need to be re-enrolled.
To program the first/short slot, first press “Delete” under the short slot, then press “Configure.”

Step 6. When prompted to “Select Credential Type”, choose the “Yubico OTP” option, then click Next.
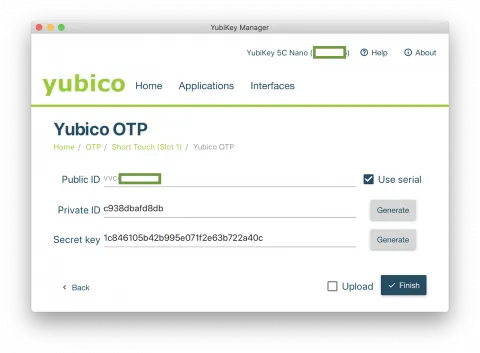
Step 7. You should now be at the screen where you will configure the YubiKey’s parameters. For “Public ID” check the “Use serial” option; click on the “Generate” button for both “Private ID” and “Secret key” and make sure that the “Upload” checkbox is not checked (this uploads the key to the Yubicloud service, but has been reported occasionally to crash the entire operation).
Before clicking “Finish”, proceed to Step 8 below. (Note: it is not recommended to write down the key secrets. If you don't know them, you can't accidentally disclose them.)
Step 8. We must provide Duo with the Yubico OTP information if we want to be able to use the passcodes with the SSH Duo module. Typically this is done by a site administrator through the Duo admin portal, as described here, but OIT has configured a self-serve portal that enables users to add their own hardware tokens: https://www.princeton.edu/duoportal
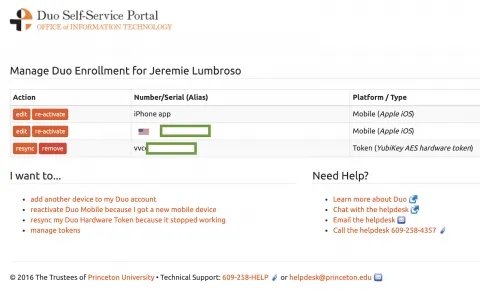
In a separate tab or browser, login to the Duo Portal and click on the “manage tokens” option.
Step 9. Click “add token” and then select the “YubiKey AES hardware token” option. You must now enter the Public ID, Private ID, and Secret Key from Step 7 (ensure that any spaces displayed are removed when entered in the portal):
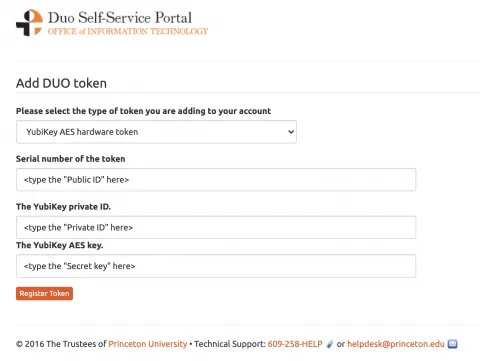
Click “Register Token” and the operation should successfully add your token to the previous dashboard. At this step, you may see an error after clicking the "Register Token" button. These errors are not always fatal. Return to the Duo Portal main page to see if your new token was added.
Step 10 (optional). Yubico has a service called Yubicloud, which allows third-party developers to integrate YubiKey functionality to implement 2FA in their services. It is a useful functionality, but requires your key information be uploaded to their cloud services. This can be done by providing the Serial Number obtained in Step 4, along with the Private ID, Public ID, and Secret key from Step 7, in the form on the Yubico upload site.
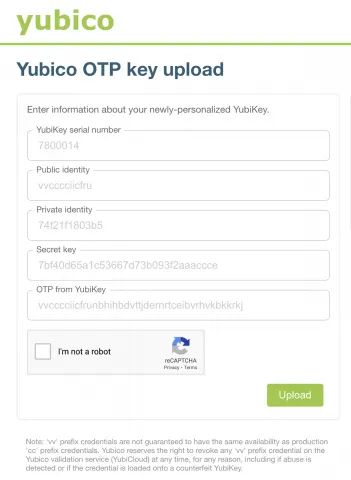
The last text field — “OTP from YubiKey” — requires a press of the YubiKey, which will generate a passcode that the service uses to check validity of the other parameters. Before performing this press, remember to click "Finish" in the YubiKey Manager application from Step 7 to complete they key programming.
Click Upload when done.
Step 11 (optional). If you’ve uploaded the Yubico OTP information to Yubicloud, you can double-check that this information has been correctly uploaded by testing it at the Yubico sandbox site.
Step 12. Now, when you log into an SSH server administered by OIT or the Computer Science Department, you can now answer the Duo prompt by pressing your YubiKey, which will enter a passcode, and also press return key to actually send the passcode. This should successfully take care of the second factor of your 2FA authentication.
(Note: This has been known to temporarily fail every now and then, just try again!)
Add your YubiKey for use with the Duo web portal
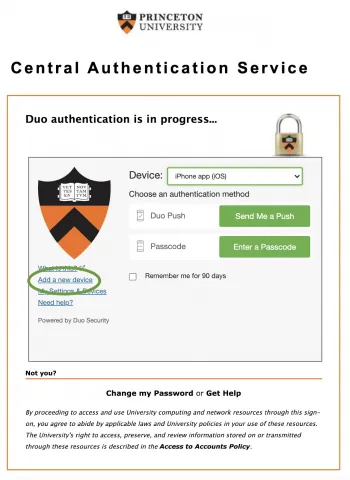
Step 13. Using an incognito window for your browser, open a web page that is protected both by the University’s CAS and Duo 2-factor authentication, such as the HR self-service page.
Step 14. Before authenticating yourself (which would cause the Duo dashboard to disappear), click on “Add a new device” — at this point, Duo will ask you to confirm your identity, but having clicked the “Add a new device” link will ensure you are not moved onward to the service you are trying to access.
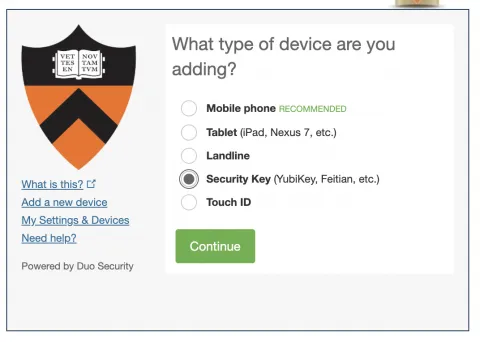
Step 15. Select “Security Key” as the type of device that you are adding, then having made sure that your browser’s pop-up blocker is deactivated, click on “Continue.”
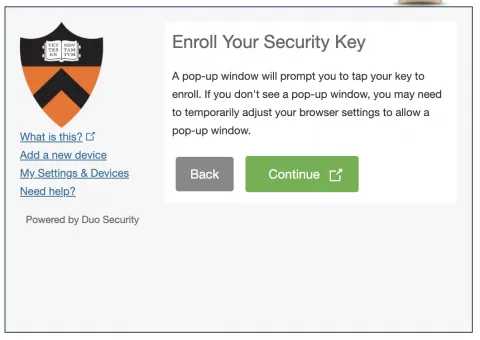
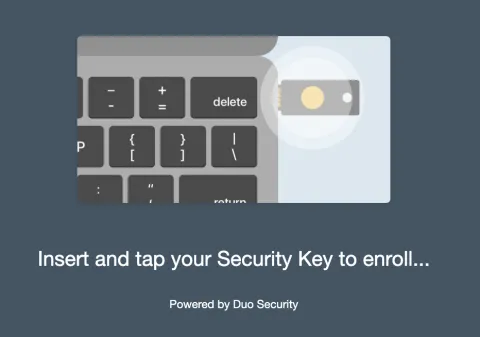
Step 16. This will open a pop-up to capture the parameters of your YubiKey. Make sure your YubiKey has been inserted into your computer’s USB-A or USB-C port, and that the LED of the key is blinking, then press it with the pop-up window in focus (as the frontmost window of your computer).
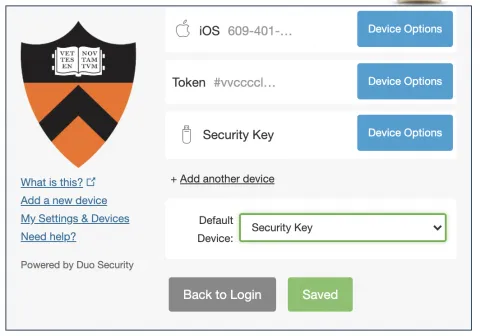
Step 17 (optional). After having successfully captured the the press on your YubiKey, the window should close and Duo should let you know that the Security Key has successfully been added. The last step is to make this Security Key your default device — this is optional, but it will streamline your future authentication.
You can do this by selecting “My Settings & Devices”, setting the “Security Key” as your “Default Device”, and pressing Save.
That's all! For future Duo web authentications, a touch of your YubiKey should complete the Duo transaction!